Installing WordPress with Docker and Quickly Migrating All Data Manually
Environment selection: Bare metal -> Docker
Main software choices: NGINX, MariaDB, phpMyAdmin
Due to MySQL’s excessive memory requirements, the original server configuration could no longer support its operation.
Therefore, purchased a new server configuration on DigitalOcean and decided to deploy using Docker for easier management.
From my observation, there currently isn’t a complete tutorial on this topic, so I’ll provide a brief overview here.
Preface
Regarding web server and database program selection:
Nginx vs Apache: What are their pros and cons?, Comprehensive comparison between MariaDB and MySQL
Reference materials (main):
How To Install WordPress With Docker Compose, Running WordPress with MariaDB
Preparations (What You Need)
- A server currently running WordPress normally
- An environment ready for deployment (can be the same server, but since you may need to temporarily run two complete WordPress services, it may require more memory >= 1G)
Installing Docker
APT Installation of Docker Packages
Refer to the official tutorial for installation.
PS: Please install docker-ce instead of docker.io, reason: What is docker.io in relation to docker-ce and docker-ee?
Grant Docker Operation Permissions to Login User
Refer to official documentation
sudo groupadd docker
sudo usermod -aG docker $USER
Writing Configuration Files
Create a folder to store all configuration files
mkdir -p $HOME/.config/wordpressWriting Docker Configuration Files (Configuration for reference only, please carefully review the information explanation section)
$HOME/.config/wordpress/docker-compose.yml
version: '3'

services:
  db:
    image: mariadb
    container_name: mariadb
    restart: unless-stopped
    env_file: .env
    environment:
      - MYSQL_DATABASE=wordpress
    volumes:
      - dbdata:/var/lib/mysql
    networks:
      - app-network

  wordpress:
    depends_on:
      - db
    image: wordpress:fpm
    container_name: wordpress
    restart: unless-stopped
    env_file: .env
    environment:
      - WORDPRESS_DB_HOST=db:3306
      - WORDPRESS_DB_NAME=wordpress
      - WORDPRESS_DB_USER=$MYSQL_USER
      - WORDPRESS_DB_PASSWORD=$MYSQL_PASSWORD
    volumes:
      - wordpress:/var/www/html
    networks:
      - app-network

  webserver:
    depends_on:
      - wordpress
    image: nginx
    container_name: webserver
    restart: unless-stopped
    ports:
      - "80:80"
      - "443:443"
    volumes:
      - wordpress:/var/www/html
      - ./nginx-conf:/etc/nginx/conf.d
      - certbot-etc:/etc/letsencrypt
    networks:
      - app-network

  certbot:
    depends_on:
      - webserver
    image: certbot/certbot
    container_name: certbot
    volumes:
      - certbot-etc:/etc/letsencrypt
      - wordpress:/var/www/html
    command: certonly --webroot --webroot-path=/var/www/html --email [email protected] --agree-tos --no-eff-email --force-renewal -d example.com -d www.example.com

volumes:
  certbot-etc:
  wordpress:
  dbdata:

networks:
  app-network:
    driver: bridge
$HOME/.config/wordpress/.env
MYSQL_ROOT_PASSWORD=XXXXXXXX
MYSQL_USER=wordpress
MYSQL_PASSWORD=XXXXXXXX
$HOME/.config/wordpress/.dockerignore
.env
.git
docker-compose.yml
.dockerignore
Configuration Information Explanation
.dockerignore
My understanding is that it’s similar to .gitignore used to ignore unnecessary files
.dockerignore File from Beginner to Practice
.env
A simple file used to store environment variables needed later, it can be named differently or not created at all
MYSQL_ROOT_PASSWORD=XXXXXXXX (Enter initial Root password)
MYSQL_USER=wordpress (Enter WordPress database operation username, can be freely filled)
MYSQL_PASSWORD=XXXXXXXX (Enter initial password for the above user)
# It is recommended to use a **password generator** to create sufficiently secure passwords
docker-compose.yml
Used to orchestrate Docker images. Describes the dependencies between Docker images and the parameters set to start them. In short, it’s to avoid manually entering too many commands and reduce operational complexity.
Using docker-compose Instead of docker run
Applying for HTTP Certificate
Let’s Encrypt HTTPS certificates can be obtained as long as your web server is running normally, so next we’ll get NGINX running normally.
Writing NGINX Configuration (Only for Obtaining Certificates)
Reference How To Install WordPress With Docker Compose
Create folder
mkdir -p $HOME/.config/wordpress/nginx-conf$HOME/.config/wordpress/nginx-conf/nginx.conf
server {
    listen 80;
    listen [::]:80;

    server_name example.com www.example.com;

    index index.php index.html index.htm;

    root /var/www/html;

    location ~ /.well-known/acme-challenge {
        allow all;
        root /var/www/html;
    }

    location / {
        try_files $uri $uri/ /index.php$is_args$args;
    }

    location ~ \.php$ {
        try_files $uri =404;
        fastcgi_split_path_info ^(.+\.php)(/.+)$;
        fastcgi_pass wordpress:9000;
        fastcgi_index index.php;
        include fastcgi_params;
        fastcgi_param SCRIPT_FILENAME $document_root$fastcgi_script_name;
        fastcgi_param PATH_INFO $fastcgi_path_info;
    }

    location ~ /\.ht {
        deny all;
    }

    location = /favicon.ico {
        log_not_found off; access_log off;
    }
    location = /robots.txt {
        log_not_found off; access_log off; allow all;
    }
    location ~* \.(css|gif|ico|jpeg|jpg|js|png)$ {
        expires max;
        log_not_found off;
    }
}
Running Containers
Enter the folder where docker-compose.yml is located
cd ~/.config/wordpressRun containers
docker-compose up -dYou will see:
Creating db ... done
Creating wordpress ... done
Creating webserver ... done
Creating certbot ... done
Check container status
docker-compose psConfirm test HTTPS certificate has been obtained
docker-compose exec webserver ls -la /etc/letsencrypt/liveRun certbot separately again
docker-compose up --force-recreate --no-deps certbotConfiguring NGINX
Reference How To Install WordPress With Docker Compose
Stop nginx service
docker-compose stop webserverDownload CertBot’s predefined NGINX SSL configuration file
curl -sSLo nginx-conf/options-ssl-nginx.conf https://raw.githubusercontent.com/certbot/certbot/master/certbot-nginx/certbot_nginx/_internal/tls_configs/options-ssl-nginx.confEdit nginx.conf (be sure to replace example.com)
Complete NGINX configuration includes HTTP redirect to HTTPS and SSL configuration.
WordPress Installation Complete
At this point, the Docker environment for WordPress has been installed.
Now when you visit your server’s IP in a browser, you should normally see the WordPress welcome screen.
The following content is about the complete quick migration of website data.
WordPress Data Migration
Database Migration
Reference official documentation
Here we choose phpMyAdmin as the database operation tool
Database Backup
Install phpMyAdmin
- APT install phpmyadmin
sudo apt install phpmyadmin- Link phpMyAdmin to web server
ln -s /uer/share/phpadmin /var/www/html/phpadmin- Access phpMyAdmin
Visit http://
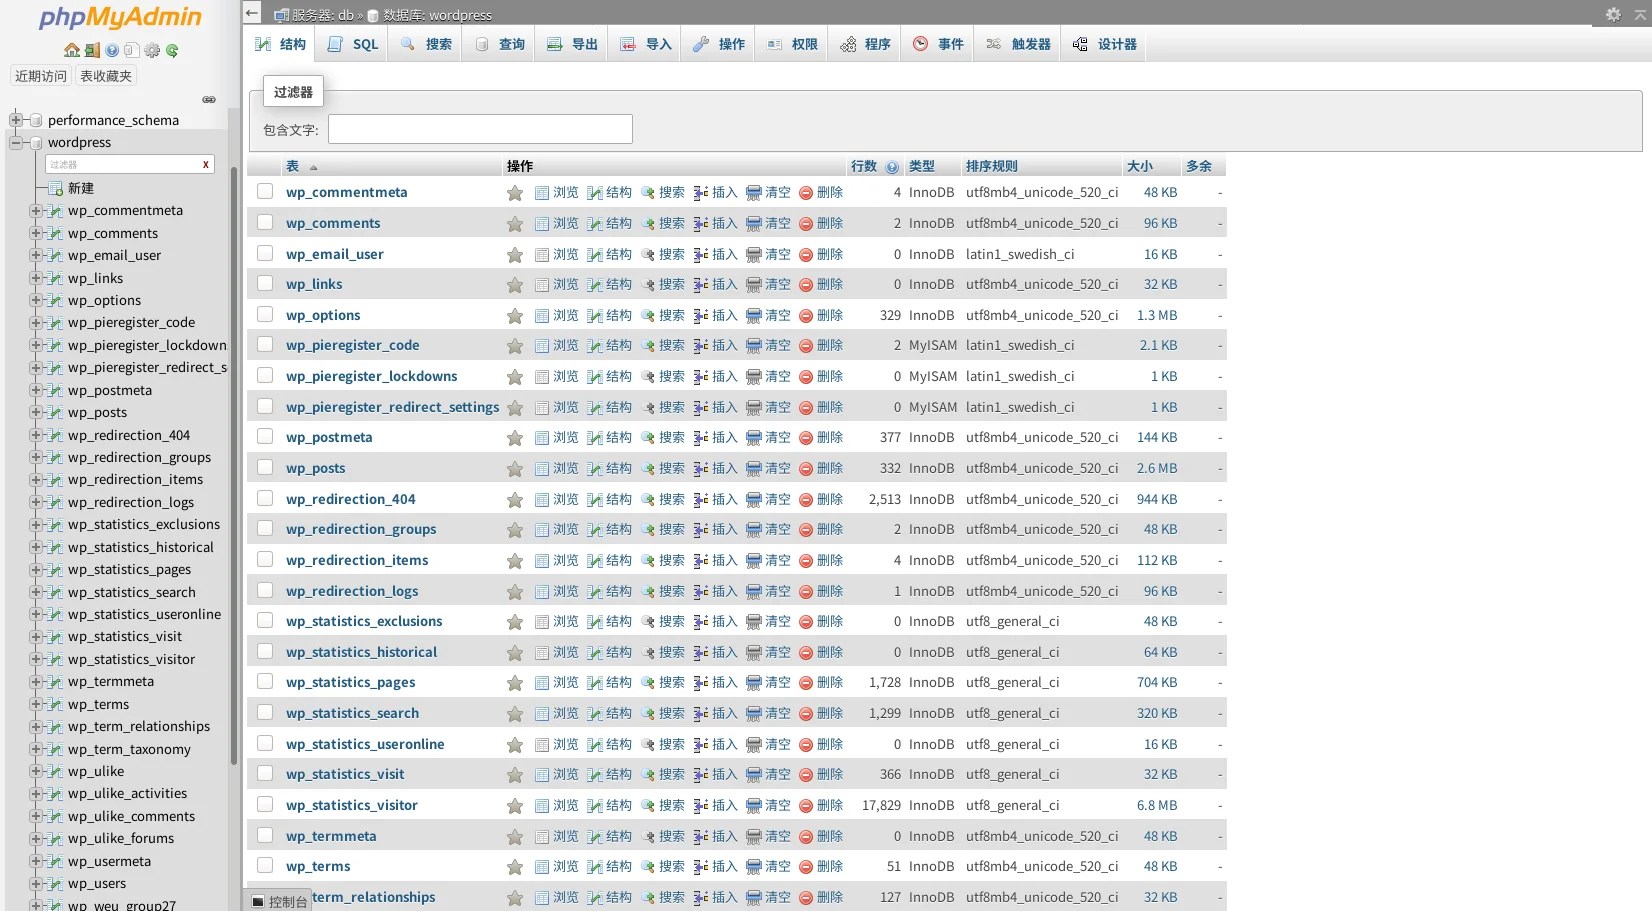
Export WordPress database
- Select WordPress database (the database you need to export)

- Click “Export” button
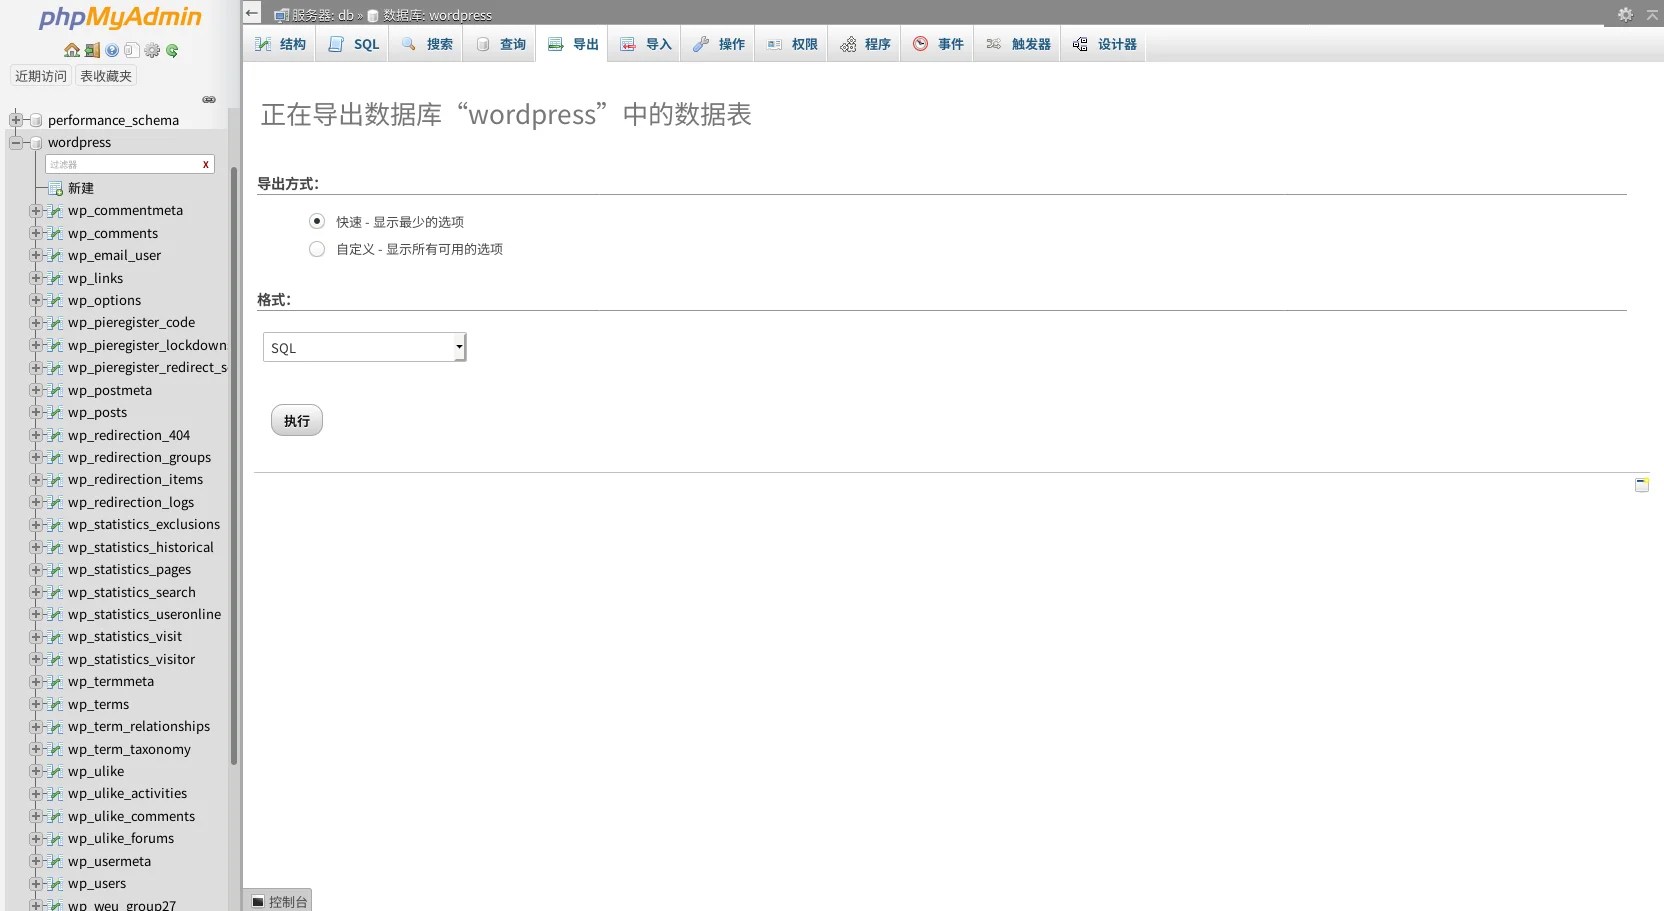
- Click “Go” to download backup file locally.
Database Import
Install Docker version phpMyAdmin
- Confirm docker internal network connection
docker network ls- Run phpMyAdmin
docker run --name myadmin -d --link mariadb:db -p 8081:80 --net wordpress_app-network phpmyadmin/phpmyadminDocker will attempt to run the image (it will download automatically if it doesn’t exist), link phpMyAdmin with MariaDB database, bind the container in wordpress_app-network, and bind the web access port to the host’s public port 8081.
- Access phpMyAdmin
Visit http://
Import WordPress database
- Select WordPress database (the database you need to import)
- Click “Import” button
- Upload backup file
- Click “Go”
Website File Migration
Website files include plugins you’ve installed, images you’ve uploaded, and other resource files.
WordPress File Backup
SSH login to old server
ssh -p <your ssh port> <your ssh login username>@<your old server IP>- Confirm website file location
ls -la /var/www/html/wordpress- Package website files
sudo tar -czvf ~/html.tar.gz /var/www/html/- Modify backup archive permissions (for easier download)
sudo chown $USER:$USER html.tar.gz- Exit SSH login
exitDownload backup archive
scp -r -P <your ssh port> <your ssh login username>@<your old server IP>:~/html.tar.gz ./WordPress File Recovery Upload Backup Archive
Upload backup archive
scp -r -P <your ssh port> ./html.tar.gz <your ssh login username>@<your new server IP>:SSH login to new server
- Extract backup archive
tar -xzvf ~/html.tar.gz- Transfer backup files to Docker volume
docker cp ~/var/www/html wordpress:/var/www- Enter folder where docker-compose.yml is located
cd $HOME/.config/.wordpress- Check transferred files
docker-compose exec webserver ls -la /var/www/html/- Fix website file permissions
docker-compose exec wordpress chown -R www-data:www-data /var/www/htmlFix WordPress Database Reading
Edit wp-config.php file
cd $/HOME/var/www/html/wordpress
vim wp-config.php
Modify the following parts to match what you set earlier in the .env file
// ** MySQL settings - You can get this info from your web host ** //
/** The name of the database for WordPress */
define('DB_NAME', 'wordpress');

/** MySQL database username */
define('DB_USER', 'wordpress');

/** MySQL database password */
define('DB_PASSWORD', '123456');

/** MySQL hostname */
define('DB_HOST', 'db:3306');
Overwrite WordPress volume wp-config.php file
docker cp wp-config.php wordpress:/var/www/html/wp-config.phpWordPress Data Recovery Complete
- Shut down phpMyAdmin
docker stop myadminTo ensure database security, be sure to stop it and only enable it when debugging is needed.
Postscript
This data migration mainly focused on two directions: environment setup (test availability) and data backup (identify relevant files).
Possible Errors and Solutions
- New website runs normally but displays no information when accessed (blank).
Reason: Database imported and running normally, website data not imported successfully.
-
Other issues, please note the following:
-
Please check if the website runs normally without importing configurations.
-
WordPress issues are mainly about file and database matching.
Troubleshooting methods:
- Check Docker logs
docker-compose logs service_name - Use phpMyAdmin to check if database and users are normal